In case, you want to know "How to setup Azure Web App", please read this blog.
URL: http://mahedevelopment.blogspot.com/2017/05/how-to-setup-azure-web-app.html
There are few ways to link the Azure account to Visual Studio.
How did I do it?
I created the web application first, then linked my Azure account while publishing.
Steps:
1. Login to https://portal.azure.com
2. Navigate to App Services section

3. Select your Web App instance
4. Click on "Get Publish Profile". A "publishsettings" file will be downloaded.

5. Open Visual Studio. Create your ASP.Net web application.
6. Once you are ready to publish, then right-click on the project and click Publish
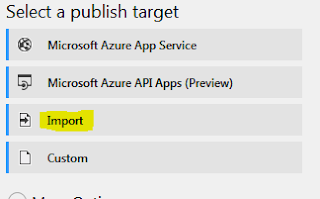
7. Select Import
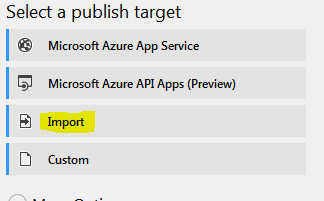
8. It opens a dialog asks for the settings file

9. Browse to the location where you have saved the publishsettings file from Azure Web App (Step 4) and choose
10. Connection tab gets populated automatically. No need to worry here.
11. Modify the values that are appropriate to you on the following tabs. These are very self-explanatory.
12. Then click Publish at the end (Preview tab)
That's it !!!!!
0 comments:
Post a Comment